
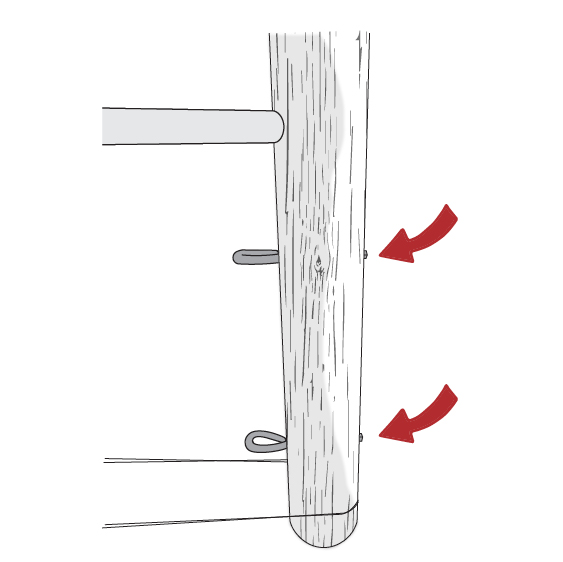
Step One
Drill two 17-18mm holes in the fence post for Eye Bolts, aligning their welded side with intended rotation; position top Eye Bolt below 2nd wire from top and bottom one between bottom and 2nd bottom wires or 2nd and 3rd bottom wires, avoiding wire obstruction, then push through holes and loosely secure with provided nut and washer.
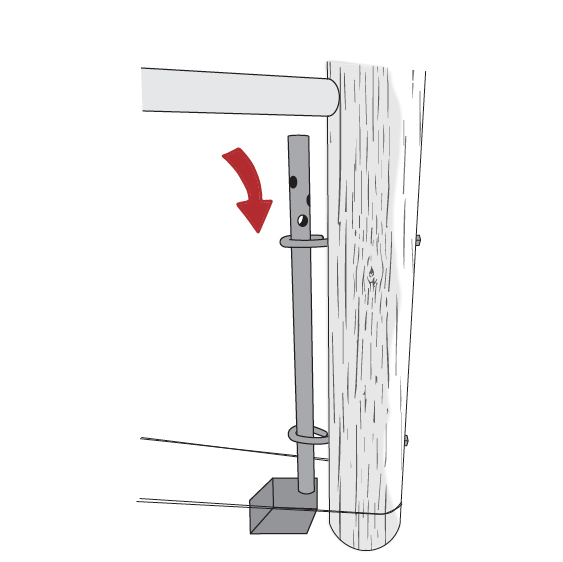
Step Two
Thread the pole through both Eye Bolts, tightening the nuts to secure them; using a block of wood or rock under the pole can assist in upcoming steps.
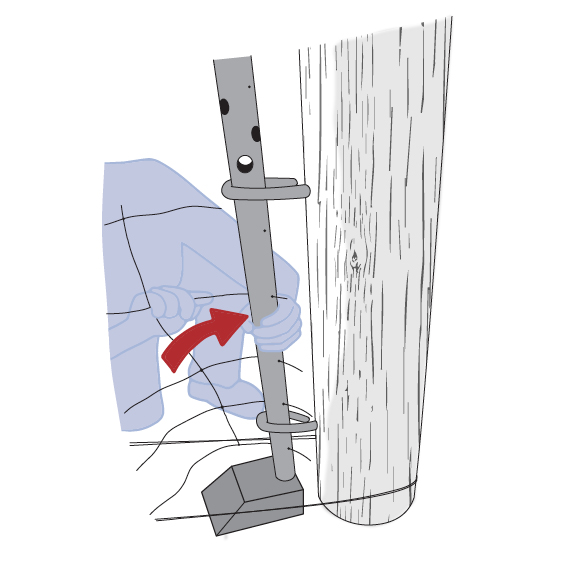
Step Three
Begin at the pole’s bottom threading each wire through its corresponding spacing hole as you ascend; after passing each wire, wrap its end around the pole to secure it. For a tidy result, trim any excess wire.
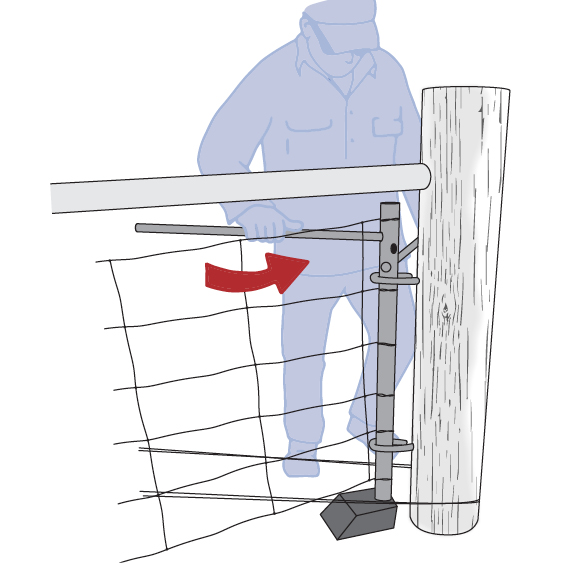
Step Four
Insert two Tensioner Bars (available separately) through the top pole holes, rotating one bar at a time to apply tension. Straighten wires if needed, cut vertical wires between top and bottom Eye Bolts for smooth rotation. Repeat until fence reaches desired tension following wire specs.
Step Five
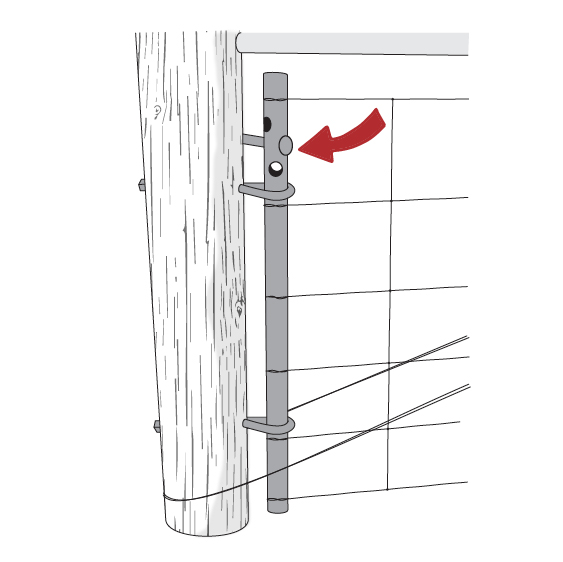
Once you have reached required tension, insert the Locking Pin through one of the large holes at the top of the pole ensuring the head of the pin is flush against the pole. Gently release the Tensioner Bar and allow the Locking Pin to hold the tension securely against the fence post.
Job Done!
Ground Setup option to allow for different Strut Setups:
Step One
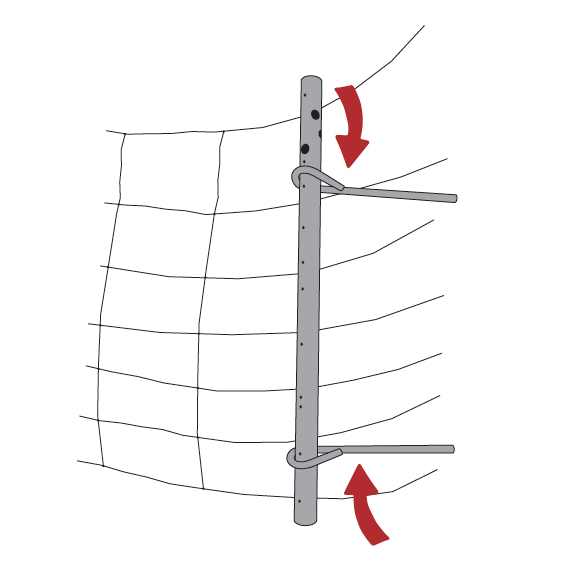
Lay the pole on the ground. Thread both Eye Bolts on to the pole aligning their welded side with intended rotation; position top Eye Bolt below 2nd wire hole from top and bottom one between bottom and 2nd bottom wire holes or 2nd and 3rd bottom wire holes.
Step Two
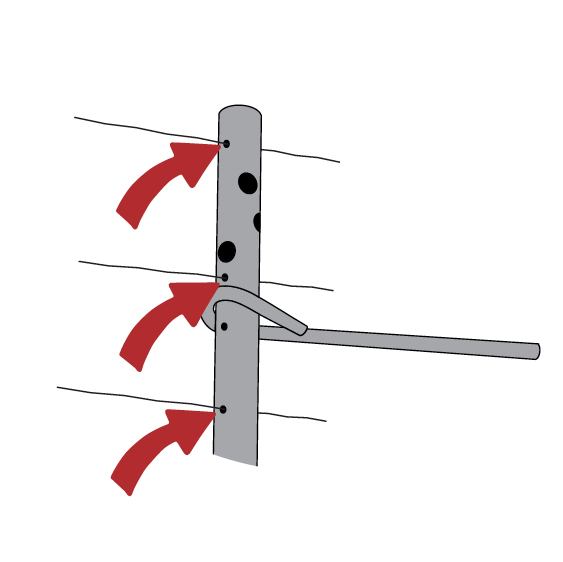
Keep the pole on the ground, begin at the pole’s bottom threading each wire through its corresponding spacing hole as you ascend; after passing each wire, wrap its end around the pole to secure it. For a tidy result, trim any excess wire.
Step Three
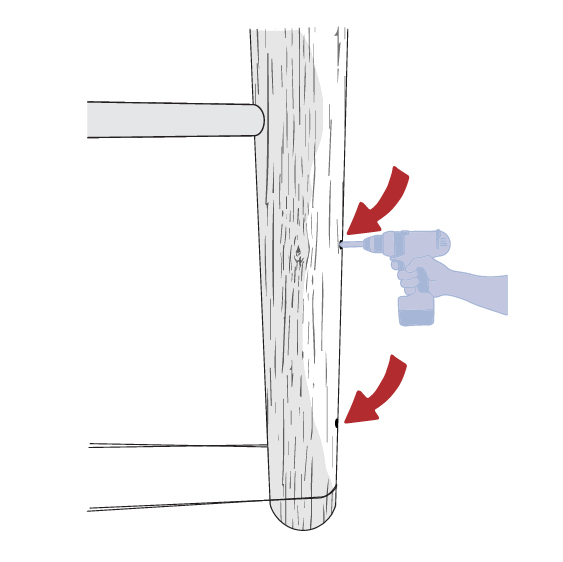
Drill two 17-18mm holes in the fence post for Eye Bolts, pick up the pole with Eye Bolts and wire attached, avoiding wire obstruction push Eye Bolts through holes in the fence post and secure with provided nut and washer; using a block of wood or rock under the pole can assist in upcoming steps.
Step Four
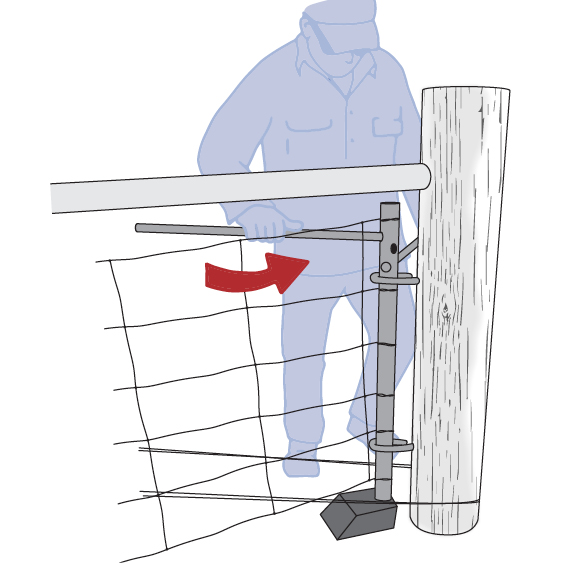
Insert two Tensioner Bars (available separately) through the top pole holes, rotating one bar at a time to apply tension. Straighten wires if needed, cut vertical wires between top and bottom Eye Bolts for smooth rotation. Repeat until fence reaches desired tension following wire specs.
Step Five
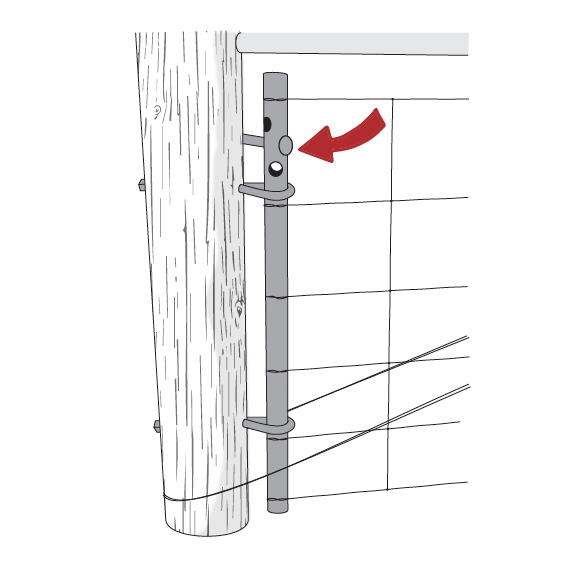
Once you have reached required tension, insert the Locking Pin through one of the large holes at the top of the pole ensuring the head of the pin is flush against the pole. Gently release the Tensioner Bar and allow the Locking Pin to hold the tension securely against the fence post.
Job Done!

CONTACT
Trudie and Mark
Phone 0477 285 233
Email admin@twistnlock.au
© Copyright Twist ‘N’ Lock 2026
Patent Pending | Privacy and Shipping Policy
FOLLOW
#twistnlock